300x600
The Best Vegan Peanut Butter
1# Healthy Peanut Butter Twix Bars (vegan & gluten free)
These healthy peanut butter twix bars are a homemade, better for you take on the candy bar we all know and love. There’s a layer of almond flour shortbread, a peanut butter caramel middle and a dark chocolate topping. Naturally sweetened, vegan and gluten free!

PREP TIME 15 MINS
COOK TIME 30 MINS
TOTAL TIME 45 MINS
Ingredients
For the shortbread base:
- 1 ½ cups packed fine blanched almond flour (I use Bob’s Red Mill)
- 3 tablespoons melted and cooled coconut oil
- 2 tablespoons pure maple syrup
- 1 teaspoon vanilla extract
- ¼ teaspoon salt
For the peanut butter layer:
- ⅔ cup drippy natural peanut butter (crunchy or creamy works)
- 1/3 cup pure maple syrup
- 1/4 cup coconut oil
- 1 teaspoon vanilla extract
- 1/4 teaspoon sea salt
- For the chocolate layer:
- 3/4 cup chocolate chips, dairy free if desired
- 1 tablespoon coconut oil
Instructions
- Preheat oven to 350 degrees F. Line an 8x8 inch square pan with parchment paper. It’s important to use an 8x8 inch as a 9x9 inch pan may be too big.
- In a medium bowl add the almond flour, coconut oil, maple syrup, vanilla extract and salt. Mix together with a fork until it forms a nice thick crumb texture. Add to pan and use your fingers to evenly press down into the pan. Bake for 10 minutes. Allow crust to cool for 10 minutes before adding caramel.
- Next make the peanut butter caramel layer: Add the peanut butter, maple syrup, coconut oil, vanilla extract and sea salt to a medium pot and place over medium-low heat for approximately 2 minutes until caramel starts to slightly bubble, stirring frequently. Pour over slightly cooled crust.
- Place in fridge for at least 30 minutes-1 hour to completely harden the peanut butter. It shouldn't take longer than this, but if you are impatient, just place in freezer for 15-20 minutes, this should speed up the process.
- After 30 minutes or so, make the chocolate layer: Add chocolate chips and coconut oil to a microwave safe bowl and microwave on high in 30 second increments, stirring in between until chocolate is completely melted. If you prefer, you can also melt the chocolate and coconut oil in small saucepan over low heat.
- Pour over the caramel layer and tilt pan side-to-side to evenly distribute the melted chocolate. Place in fridge for at least 20 minutes until chocolate is completely hardened and bars are cooled.
- Remove bars from pan and cut into 16 bars (that resemble twix bars). To do this, cut entire pan of bars in half, and then cut each half into 8 (1-inch) bars (not squares!), so you’ll end up with 16 bars. Enjoy! Bars should be kept covered in the fridge until ready to serve.
This article adapted from this site
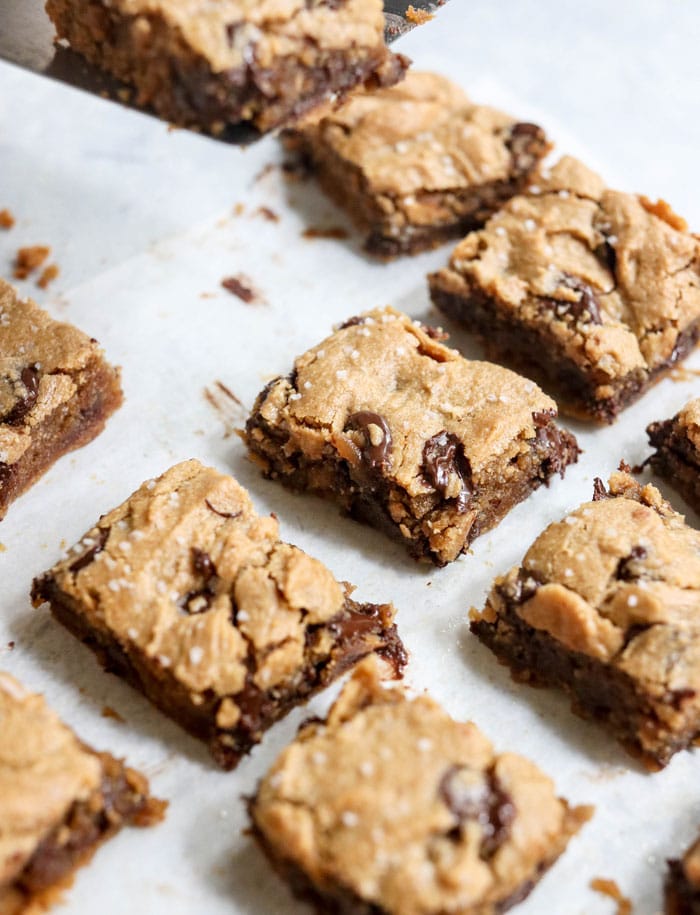
2# Peanut Butter Blondies (Flourless!)

This Peanut Butter Blondie recipe is naturally gluten-free, and is sweetened with honey for a healthy dessert. I love that they are flourless and oil-free!
PREP TIME 10 minutes
COOK TIME 20 minutes
TOTAL TIME 30 minutes
SERVINGS 16
AUTHOR Megan Gilmore
INGREDIENTS
- 1 cup all-natural peanut butter (preferably organic)
- 1/3 cup honey
- 1 whole egg
- 1/4 teaspoon sea salt , plus coarse salt if desired as a topping
- 1/2 teaspoon baking soda
- 1/2 cup dark chocolate chips
INSTRUCTIONS
- Preheat oven to 350F and line an 8" or 9" square pan with parchment paper. (Pro Tip: Grease the pan with a little spray oil first to help keep the parchment paper in place when you add the batter)
- In a mixing bowl, combine the peanut butter, honey, egg, salt and baking soda and stir well, until a thick and sticky batter has formed. Fold in the dark chocolate chips, if using.
- Use a spatula to pour the batter into the prepared pan, then use it to smooth the top. Sprinkle coarse sea salt over the top of the batter, if desired. (I highly recommend it!)
- Bake at 350ºF until the top is a light golden brown, about 20 minutes. Let the blondies cool completely, as they are very fragile when warm, then cut into squares and serve. I like to store mine in the fridge in an airtight container, for a really firm texture and longer shelf life.
This article adapted from this site


0 Comments